Showing posts with label DIY. Show all posts

Tuesday, April 10, 2012

Honey-Do

In “our house of dreams” (re: Anne Shirley to Gilbert Blythe in Anne of Windy Poplars) we have some sort of outdoor space for Z to do manly things.  His tools are currently stuck in the hallway closet, which is not conducive to most manly activities.  


This outdoor space might be a shed.  It might be a garage.  We won’t know until we find “our house of dreams.”  One thing I do know:  I’ve got a Honey-Do list a mile long just waiting for Z when we find it!! The following is a list of things Z is going to make for me...he just doesn’t know it yet.


This one assumes that our dream home also includes some outdoor entertaining space.  But is this not genius? A wall mounted cabinet/shelf thing that you can fold down when you are using it and fold up when you are not!  Genius, I tell you!  This is for sale here but it's totally a DIY.


Serena at The Farm Chicks included this lovely idea in her kitchen remodel.  It's a cutting board with a hole over the trash can!  No more walking all the way across the kitchen with a balancing act of kitchen scraps, only to have half of the scraps go over the sides when you get to the trash can anyway.  You may call this idea lazy.  I call it genius.


This idea for storing cutting boards and cooking sheets uses tension rods and comes from Martha Stewart's design blog.  Now if it just uses tension rods, why do I need Z to make it for me?  Good question, glad you asked.  In our town house, I don't have a pantry as shown in the picture.  I really can't complain about the storage I do have in the kitchen...it's a lot given that we are in a rental.  But I tried this idea and, unfortunately, over every cabinet is a drawer.  Which means there is nothing for the top of the tension rod to "tense" against.  So my idea is a free standing doo-dad with the rods secured in some sort of a base.  Z!!!  I NEED YOU!!!


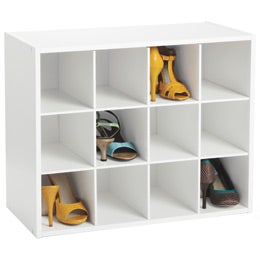
This last one may need to happen sooner rather than later.  Our shoe "corner" by the door is a hot mess.  This beauty is from The Container Store and I've seen other ones like it in other stores.  But  I have a hard time paying $30 or $40 for this when it's so obviously an easy DIY.


*Sigh...* those are just a few things on Z's honey-do list.  Guess I'll keep dreaming for now.

Monday, April 2, 2012

Magic Potion

I HATE cleaning the bathroom.  Hate with a capital H-A-T-E.  It grosses me out.  All other chores I dislike because they are boring and there are other things I would rather be doing.  But, let’s face it, cleaning the bathroom is gross.

I find it especially disgusting in a rental.  I always feel like I’m cleaning strangers leftover bathroom ick, no matter how many times I clean.  The walls were (until yesterday) particularly grimy.  (I won’t show you a before picture because I don’t want to be responsible for replacing your keyboard after you throw up all over it.)  I’ve mentioned before the mold we’re growing.  By now we could probably start our own penicillin factory.  I’ve tried to clean the walls a few times to no avail.  I’ve used all kinds of different chemical concoctions on them.  I had a particularly frustrating run in with a Mr. Clean Magic Eraser.

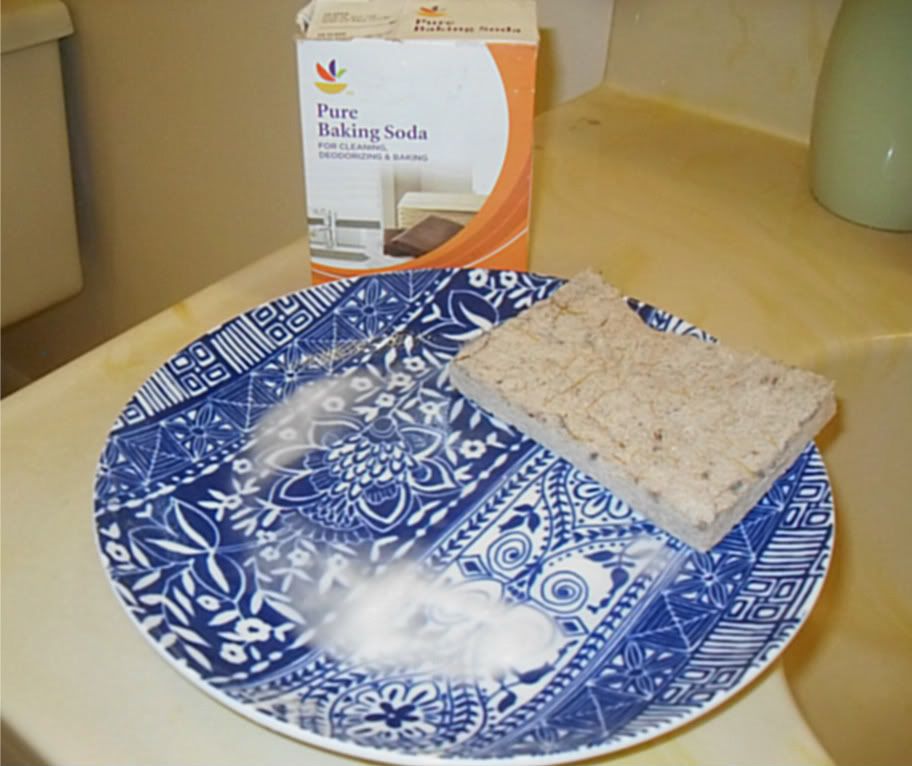
But yesterday I discovered a magic potion.  This potion cleans better, is less expensive, and is more eco friendly than any other cleaning solution I have ever tried. There are three parts to this magic potion.

1.  Baking Soda
2.  Water
3.  Sponge


No.  Seriously.  That’s it.  

I’ve been reading all these posts online about how baking soda and vinegar are the only two cleaning products you need.  Ever.  So I thought I’d give it a shot.  I mixed up a bit of baking soda with some water into a fairly runny paste.  And then I started scrubbing.

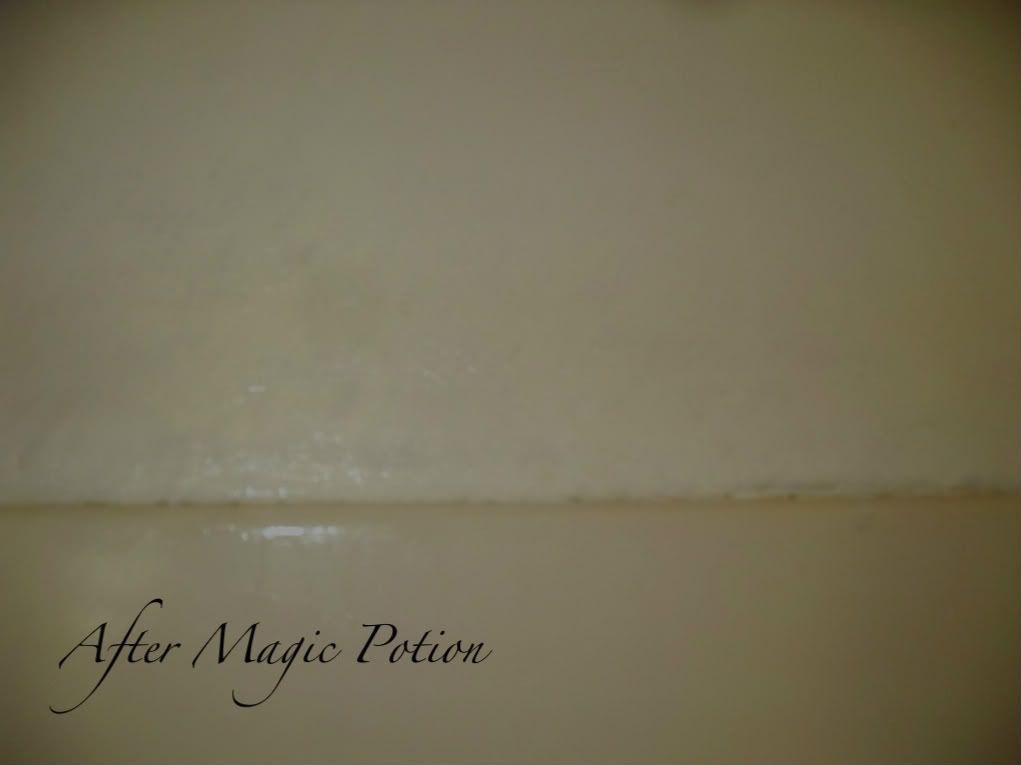
I started on the wall behind the sink where all the toothpaste splatter hits.  When I stepped back to look at the result, I said the following out loud in my bathroom:  “Holy *expletive that is appropriate to use while standing in a bathroom*!”  Immediately followed by “Z!  Come here!!!”  I had to show off the results.  Z was as impressed as I was.

I did the rest of the walls.  This stuff is amazing.  It took off all the strange orange sticky spots of alien spawn grime that had been there since we moved in.  It got rid of the yellow nicotine sheen from the previous tenants.  It tackled the dirt that had caked into the textured grooves of the paint (note to self:  I will never Ever EVER have textured walls in a house where I can control that sort of thing).  And the most amazing thing?  It significantly lightened the mold spots above our bathtub.  I’m telling ya:  Magic Potion.  This stuff will change your life.


To make Magic Potion:
Mix baking soda and water in a shallow dish so that it forms a fairly runny paste.  Using a bit of elbow grease, apply to walls.  Rinse out sponge and wipe down walls with plain water (this is important, otherwise you leave a gritty film of baking soda all over everything).

Note:  We have white (well, grimy yellow) walls in our town house.  I do not know how this treatment will affect painted walls.  Use at your own risk.  I am not responsible for the results.

Thursday, March 29, 2012

DIY: Dresser Organizing Tray

For the life of me, I could NOT figure out where this orange smut was coming from on some of our bakeware.  It would occasionally show up in the dishwasher but more often I would find spots of it on our cookie sheets/baking pans/etc.  It always wiped off easily, but it would keep reappearing.  What was it??

Oh.  It was rust.

Two of our cookie sheets were starting to rust underneath the handles.  *Sigh...* they were presents at my wedding shower and we are, after all, approaching old-married-couple status (almost TWO WHOLE YEARS).  I didn’t want to just throw them out, though.  They were too good an opportunity to pass up.  So I made a snazzy tray/organizer for my dresser.


First I went to the thrift store to look for some nice fabric I might want to use.  I like to buy clothes and deconstruct them for projects like this.  It just feels thriftier and more earth friendly.  I bought a summer weight suit...thing.  The fabric was nice, but the cut of the...thing...was ugly.  I rather feel like I saved some unfortunate person from a fashion disaster by using it for my tray.  


I deconstructed the top and as a bonus got these sweet buttons to use in a future project!


Then I used spray adhesive to stick it to my cookie sheet.  I’d never used spray adhesive before, so it was kind of a learning experience.  Basically, I just wrapped the tray like I would wrap a present and used the adhesive instead of tape.


Voila!  It’s really amazing how much more organized my dresser stays with this thing.  Maybe it just feels more organized because, instead of laying on top of the dresser, all my stuff is laying in a tray.  Much prettier.  I also snagged some little dishes (I actually think the “crystal” one is an ashtray) and a votive candle holder for $.25 a pop at the thrift store to help organize my stuff, too.


Learn from my mistakes:
-  I really needed some chalk for this project.  You would think as a teacher I would have some lying around but nope.  The chalk really would have helped to mark how big my tray was.  As it was I ended up with A LOT of extra fabric that I had to cut off later.
-  I learned to let the spray adhesive dry slightly before sticking the fabric to it.  There is a place in one corner where the fabric got all gross from the adhesive.  My jewelry box is currently sitting on top of that corner.


P.S.  The ugly brown carpet is our living room.  I HATE it....but I can’t do anything about it as we are renting.  

What do you think about putting a large area rug in the living room?  Would a rug on top of carpet look weird?  Thoughts?

Monday, March 26, 2012

Couponing 101?

Sunday afternoon on EZ’s street is devoted to grocery shopping.  Don’t be offended if you ask if I want to hang out on Sunday and I give you a blank stare.  Hang out?  Sunday?  Those two words go together?  It’s not you...it’s just that, well, Sunday afternoon is devoted to grocery shopping.

I am most definitely not a Coupon Queen (Watch and laugh.  Please.) I have, however, devised a system that allows me to save somewhere between $20-$30 every week.  

Here are the things that I did/do that worked/work for me:

1.  Prioritize:  Decide what is important to you and your family.  The reason setting your priorities is important is that it will, to some degree, influence how much money you are able to save.  My priorities are lots of fresh fruits and vegetables, organic when possible/practical, and time.  Fresh fruits and vegetables often don’t have coupons in the regular sunday paper or on the mainstream coupon websites.  It’s also rare to find coupons on organic items in those same places.  But I have made time and health a priority.  Could I save more money if I went to multiple stores after perusing multiple store fliers to find the best deals on individual items? Or if I bought less fresh fruits and vegetables and more processed food?  Probably...but having some time on Sunday afternoon with my husband while both of us are healthy and happy is more important to me.

2.  Set aside some time:  That being said....you are going to have to spend SOME time preparing.  You can’t just walk into the nearest grocery store without doing any prep work and expect to come out with big savings.  My preparation involves finding recipes for dinner for the week, making a list from those ingredients, “shopping” the house to see what we need to restock (or, more commonly, asking Z “do we need more toilet paper? What about rice?”), cutting coupons from the paper, printing coupons from websites, organizing coupons in my coupon book, pulling the coupons that I think I will want to use, and throwing away the coupons that have expired.  Ummm...that’s why I can’t hang out with you on Sundays.

3.  Make a list:  This step is important (at least for me) because without a list, I usually end up forgetting about 3 things I need.  That means multiple trips to the grocery store throughout the week, which is a waste of time.  Also, without a list I end up with a mish-mash of stuff and no idea what to do with it for dinner.

4.  Cut coupons:  I love coupons.  I really do.  Each one is like money in your pocket.  I use the Sunday paper for coupons but I also check out www.coupons.com, www.coolsavings.com, and www.couponbug.com.  www.horizondairy.com and www.stonyfield.com offer some coupons on their organic dairy products.

Also check out your local grocery store’s coupon policy.  A lot of places will double your coupons up to a certain amount if you have a member card with them.

5.  Organize:  This was the most important step for me but I imagine this is also the most personal step.  I used to keep all of my coupons jumbled up together in an envelope in my purse and I never knew what coupons I had and what I didn’t.  I also had to go through EVERY SINGLE COUPON every time I wanted to use a certain coupon.  Again- waste of time.  Then I tried one of those accordion wallet things for coupons.  But I found that I still couldn’t keep track of what coupons I had and what I didn’t have.

So I got a small photo album and it changed my couponing life!!  I am able to see each and every coupon that I have.  I have them organized by section of the store.  They are also organized so that the coupons that expire earlier are on top while the ones that expire later get put in the back.  It’s got a nice hard cover that I can use to write on while at the store.  Mine even has a rubber band around the outside that I use to hold the coupons that I use so that they are out of the way but still easily accessed at the checkout.


6.  Pat yourself on the back:  The grocery store that I go to puts the savings on the bottom of the receipt.  I love looking at the total and telling myself that, because of a few hours spent on a Sunday afternoon, we have an extra $20-$30 in our pockets.  YAY ME!

Some final thoughts:
-  I don’t look at the store fliers included in the Sunday paper.  I find that when I start buying stuff because “it’s a good deal” I end up spending more money and have a pantry full of stuff I don’t need.
-  I go to the same grocery store every week.  It saves time because I know where everything is.  The store I go to also gives gas reward points (money off a gallon of gas for money spent at the store) which I think helps to even out the possibility that I could save more money elsewhere.
-  Get a shoppers club/VIP/members card.  Not all of my savings come from coupons.  A lot are from deals that are given to store members.  Also, at my store, coupons up to $.99 are doubled with a shoppers card.  That means a $.75 off coupon turns into a $1.25 off coupon.
-  It’s just me and Z at home...so I’m sure these rules will change as our family grows.  
-  Finally:  Take what works for you.  Ignore what doesn’t.  If none of this makes sense...do your own thing.  Whatev.

Do you do anything different?  What works for you?  Care to share?

Thursday, March 22, 2012

Magic Cookies

Baking is magic.  Or at least it seems like magic to me.  I know it's really just science...but you put lumps of a slightly cold, gelatinous mish-mash of edible-but-not-very-tasty ingredients into a hot oven and PRESTO CHANGE-O...magic, I tell ya.

I don't bake very often for a few reasons.  1) It's just me and the Z-meister at home.  A recipe of cookies usually makes something in the neighborhood of 50 cookies.  There's no way we could (or should) eat all those cookies by ourselves.  2) While baking is magic, it is also very finicky.  Too much of this, not enough of that, or even just the wrong humidity in the kitchen can make a recipe go south without you even knowing what happened.  3)  By the time I get to the end of a baking adventure, I've licked so much dough/batter off my fingers the spoons that I don't even want to try what I've made!

Tonight, however, the planets aligned and gave me an opportunity to bake AND have it come out wonderfully (although I was still sick of the cookie dough by the end of it all).  One of my classes at school earned a prize so I made them cookies.  BEHOLD:


 Ok...well, that's them in the unbaked state.


That's better!  Here they are cooling out of the oven.


Mmmm....the finished product.  There were enough extras for Z and I to taste test.  They are delicious.


These are cranberry dark chocolate chip oatmeal cookies.  They are surprisingly not bad for you as far as cookies go.  Something along the lines of 100 cal per cookie.  I also think they would make an awesome breakfast.  Hey!  They have cranberries and oatmeal in them...what more do you want?

Here's the recipe.  It's from the Taste of Home cookbook with a few tweaks:

1 cup baking margarine, softened
1 cup sugar
1 cup packed brown sugar
2 eggs
1 tsp vanilla extract
2 cups all purpose flour
1 tsp baking soda
1/2 tsp baking powder
1/2 tsp salt
1 tsp cinnamon
2 cups old fashioned oats
1 cup dark chocolate chips
1 cup sweetened dried cranberries

1)  In a large bowl, cream butter ans sugars until light and fluffy.  Beat in eggs and vanilla.  Combine the flour, baking soda, baking powder, salt, and cinnamon; add to creamed mixture and mix well.  Stir in oats, chocolate chips, and cranberries.

2) Drop by rounded spoonful onto ungreased cookie sheet.  Bake at 350 for 10 minutes until golden brown.  Cool on a wire rack.

The original recipe said it made 4 dozen.  I got 74 cookies out of it.  Maybe my cookies were really small?? I don't know...

If you try the recipe, let me know how it turns out!!